Photography: 5 Ways to Add Height to Food Photos

What is one of my favorite tricks when it comes to photography? I love to add height and dimension by using props and ingredients. By adding height, you can tell so much more of the story but setting the appropriate scene. Plus, the height in the photo helps draw the eye all throughout the photo as it picks up colors and textures.

As you can see in the photo above, had I just photographed the salmon on the cedar plank, the recipe would have appear very bland and boring. Everyone knows what cooked salmon is supposed to look like. Instead, I saved some herbs, placed a few sprigs on top of the salmon to add a bit of color and texture, and then put the rest of the herbs in a mason jar and placed them in the background of the photo. Looking at the photo above, the height helps accentuate the dish.

5 Ways to Add Height to Food Photos

1.) Ingredients

When preparing the recipe that you’re going to photograph, set aside some of the ingredients to include in your scene. Not only does adding ingredients allow people to know what was involved in the making of the recipe, but they are a great way to add dimension and texture. If you’re cooking with herbs, set aside a few, place them in a jar, and set them in the background of your scene. You can also use foods such as apples, onions, bread slices … basically any ingredient that is of larger size. Jars filled with milk, cream, flour, or sugar are another great way to add height without being a distraction since the colors of the contents of the jars are neutral.

2.) Props

Do you have decorative pitchers, jugs, vases, or bottles? All of these common household items are great to place in the background of a food photography scene. If they are clear or have subtle decorative touches, they will not only add height to a food photo, but also will add to the story of the scene and add texture without being a distraction.

3.) Utensils

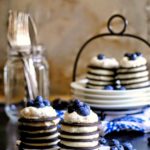
I love collecting vintage, rustic silverware and cooking utensils. An easy way to add height with utensils is to place a few of them in a mason jar and set the jar at the back of the scene.

4.) Backgrounds

You can use the rule of thirds to your advantage by filling one side of your frame with the recipe. You can fill the rest of the frame with a textured backdrop filled with rustic wood or a welcoming chair.

5.) Plates

Set the scene by featuring the main dish at the front of the photo. Next, place stacked plates in the background to show that the recipe is more than one serving and could a great dish to serve when entertaining guests. People will  see the stacked plates and want to grab one to serve up a piece of the recipe. You can also use a cake plate to elevate the recipe above the rest of the setting in your photograph.
What’s your favorite way to add height to food photos?


Join the List

Leave a Reply

Your email address will not be published. Required fields are marked *

Latest from Instagram

This error message is only visible to WordPress admins

Error: No feed found.

Please go to the Instagram Feed settings page to create a feed.

Copyright © 2024 · Theme by 17th Avenue